Tragedy at Kufra
Videos
The Tragedy at Kufra occurred in May 1942 during World War II, when 11 of 12 South African aircrew flying in three Bristol Blenheim Mark IV aircraft of No. 15 Squadron of the South African Air Force d

Blenheim light bomber

The cockpit of a Bristol Blenheim Mark IV on display at the Imperial War Museum Duxford in August 2005.
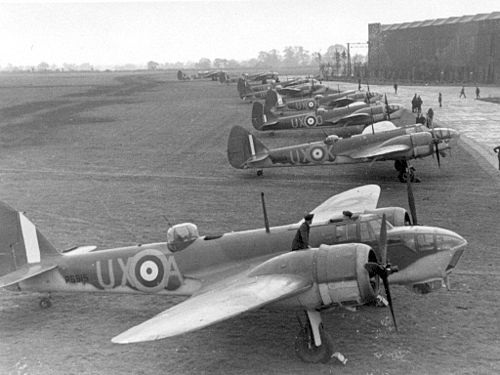
A line-up of Bristol Blenheim Mark IVs, the same of type of aircraft forced down in the Kufra incident.

A Royal Air Force Bristol Blenheim Mark IV similar to those involved in the Kufra incident being serviced in the Middle East ca. 1942.
Libyan Desert
Videos
The Libyan Desert is a geographical region filling the northeastern Sahara Desert, from eastern Libya to the Western Desert of Egypt and far northwestern Sudan approximately 1,300,000 km². On medieval
Tragedy at Kufra
…of thirst and exposure, after the flight became lost following a navigational error near the oasis of Kufra in Libya and made a forced landing in the Libyan Desert. The South African Air Force's 15 Squadron, equipped with Bristol Blenheim Mark IV aircraft, departed South Africa in January 1942 for service in Egypt…

The Libyan Desert landscape east of the Gilf Kebir.

Acacus landscape